Deploy a 3 tier Microservice using React, Node.js, and Java
Deploy a 3 tier Microservice using React, Node.js, and Java
-
Prerequisites
- The instructor should Setup Workshop Environment
- The student should Setup CLI and Terminal Shell
-
Instructor will provide the following info:
- OpenShift Console URL (OCP_CONSOLE_URL)
- The username and password for OpenShift and Git Server (default values are user1, user2, etc.. for users and
passwordfor password).
-
Set
TOOLKIT_USERNAMEenvironment variable. If you are participation in a workshop replaceuserdemowith your assigned username (ex.user01).TOOLKIT_USERNAME=userdemo -
(Skip if using KubeAdmin or IBM Cloud) Login to OpenShift using
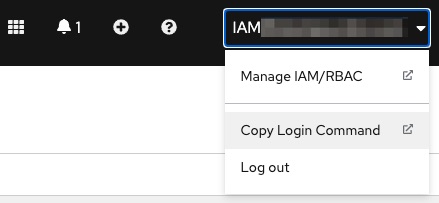
oc- If using IBM Cloud cluster then login with your IBM account email and IAM API Key or Token by using the Copy Login Command
- If using a cluster that was configured with the workshop scripts outside IBM Cloud then use respective assigned username (ex.
user01), and the password ispasswordoc login $OCP_URL -u $TOOLKIT_USERNAME -p password
- If using IBM Cloud cluster then login with your IBM account email and IAM API Key or Token by using the Copy Login Command
-
Set
TOOLKIT_PROJECTenvironment variable If you are participation in a workshop replaceprojectdemobased on your assigned username (ex.project01).TOOLKIT_PROJECT=projectdemo -
Create a project/namespace using your project prefix, and
-devand suffixoc sync $TOOLKIT_PROJECT-dev -
Fork Inventory Sample Application Java
- Open Developer Dashboard from the OpenShift Console
- Select Starter Kits
- Select Inventory Service (Java)
- Click Fork
- Login into GIT Sever using the provided username and password (ie
user1andpassword) - Click Fork Repository
-
Setup environment variable
GIT_URLfor the git url using the value from previous step or as followingGIT_REPO=inventory-management-svc-solution GIT_URL=http://${TOOLKIT_USERNAME}:password@$(oc get route -n tools gogs --template='{{.spec.host}}')/${TOOLKIT_USERNAME}/${GIT_REPO} echo GIT_URL=${GIT_URL} -
Create a pipeline for the application
oc pipeline --tekton ${GIT_URL}#master -p scan-image=false- Open the url to see the pipeline running in the OpenShift Console
-
Fork Inventory Sample Application TypeScript
- Open Developer Dashboard from the OpenShift Console
- Select Starter Kits
- Select Inventory BFF (TypeScript)
- Click Fork
- Click Fork Repository
-
Setup environment variable
GIT_URLfor the git url using the value from previous step or as followingGIT_REPO=inventory-management-bff-solution GIT_URL=http://${TOOLKIT_USERNAME}:password@$(oc get route -n tools gogs --template='{{.spec.host}}')/${TOOLKIT_USERNAME}/${GIT_REPO} echo GIT_URL=${GIT_URL} -
Create a pipeline for the application
oc pipeline --tekton ${GIT_URL}#master -p scan-image=false- Open the url to see the pipeline running in the OpenShift Console
-
Fork Inventory Sample Application React
- Open Developer Dashboard from the OpenShift Console
- Select Starter Kits
- Select Inventory UI (React)
- Click Fork
- Click Fork Repository
-
Setup environment variable
GIT_URLfor the git url using the value from previous step or as followingGIT_REPO=inventory-management-ui-solution GIT_URL=http://${TOOLKIT_USERNAME}:password@$(oc get route -n tools gogs --template='{{.spec.host}}')/${TOOLKIT_USERNAME}/${GIT_REPO} echo GIT_URL=${GIT_URL} -
Create a pipeline for the application
oc pipeline --tekton ${GIT_URL}#master -p scan-image=false- Open the url to see the pipeline running in the OpenShift Console
-
Setup environment variable
GIT_OPS_URLfor the git url using the value from previous step or as followingGIT_OPS_URL=http://${TOOLKIT_USERNAME}:password@$(oc get route -n tools gogs --template='{{.spec.host}}')/toolkit/gitops echo GIT_OPS_URL=${GIT_OPS_URL} -
Clone the git repository and change directory
cd $HOME git clone $GIT_OPS_URL gitops-inventory cd gitops-inventory -
Review the
qadirectory in the git repository, the directory might be empty if the 3 pipelines are not done yet.ls -l qa/${TOOLKIT_PROJECT}/ -
Review the
qadirectory in the git repository againls -l qa/${TOOLKIT_PROJECT}/You should see 3 directories
inventory-management-bff-solution/
inventory-management-svc-solution/
inventory-management-ui-solution/
Note
If you don't see the directories, this is a good time for a coffee break of 15 minutes until all 3 Pipeline Runs are done.
-
Once the Pipeline Runs are done, try to list the directories again. Each directory contains their corresponding yaml manifest files (ie Helm Chart)
ls -l qa/${TOOLKIT_PROJECT}/inventory-management-bff-solution ls -l qa/${TOOLKIT_PROJECT}/inventory-management-svc-solution ls -l qa/${TOOLKIT_PROJECT}/inventory-management-ui-solution -
Promote the application to QA using git by creating a manifest yaml (ie Helm Chart) that leverage the Cloud Native Toolkit chart
argocd-configto automate the creation of multiple ArgoCD Applications.git config --local user.email "${TOOLKIT_USERNAME}@example.com" git config --local user.name "${TOOLKIT_USERNAME}" cat > qa/${TOOLKIT_PROJECT}/Chart.yaml <<EOF apiVersion: v2 version: 1.0.0 name: project-config-helm description: Chart to configure ArgoCD with the inventory application dependencies: - name: argocd-config version: 0.16.0 repository: https://ibm-garage-cloud.github.io/toolkit-charts EOF cat > qa/${TOOLKIT_PROJECT}/values.yaml <<EOF global: {} argocd-config: repoUrl: "http://gogs.tools:3000/toolkit/gitops.git" project: inventory-qa applicationTargets: - targetRevision: master createNamespace: true targetNamespace: ${TOOLKIT_PROJECT}-qa applications: - name: qa-${TOOLKIT_PROJECT}-inventory-svc path: qa/${TOOLKIT_PROJECT}/inventory-management-svc-solution type: helm - name: qa-${TOOLKIT_PROJECT}-inventory-bff path: qa/${TOOLKIT_PROJECT}/inventory-management-bff-solution type: helm - name: qa-${TOOLKIT_PROJECT}-inventory-ui path: qa/${TOOLKIT_PROJECT}/inventory-management-ui-solution type: helm EOF cat qa/${TOOLKIT_PROJECT}/values.yaml git add . git commit -m "Add inventory application to gitops for project ${TOOLKIT_PROJECT}" git push -u origin master -
Register the Application in ArgoCD to deploy using GitOps
- Select ArgoCD from the Console Link and login using OpenShift login
- Click NEW APP
- Application Name: ${TOOLKIT_PROJECT}-inventory (ie project1-inventory)
- ArgoCD Project:
default - Sync Policy:
Automatic(Check prune resources and self heal) - Repository URL:
http://gogs.tools:3000/toolkit/gitops.git - Revision:
HEAD - Path:
qa/${TOOLKIT_PROJECT}(ie qa/project1) - Cluster:
in-cluster - Namespace:
tools - Click CREATE
-
Review the Applications in ArgoCD
- Filter by Namespace
${TOOLKIT_PROJECT}-qa(ie project1-qa) - Review Application: inventory-management-svc-solution
- Review Application: inventory-management-bff-solution
- Review Application: inventory-management-ui-solution
- Filter by Namespace
-
Review the Application in OpenShift
- Switch to Developer perspective
- Select Topology from the menu
- Switch to project
${TOOLKIT_PROJECT}-qa(ie project1-qa) - Open the Application from the JavaScript UI and make sure the stocks show up in the browser. Click on the route url on from the ui deployment, or the link on the circle.
-
Now the Microservices application is ready for the development teams, in some cases each team will own and work with the git repository for the microservices, while the gitops git repository is own by the operations team.
-
Congratulations you finished this activity, continue with another lab in the workshop