Argo CD (OpenShift GitOps)
Use GitOps to continuously deliver application changes
Argo CD is a declarative, GitOps continuous delivery tool for Kubernetes. The deployment environment is a namespace in a container platform like Kubernetes or Red Hat OpenShift.
Argo CD models a collection of applications as a project and uses a Git repository to store the application's desired state.
Argo CD is flexible in the structure of the application configuration represented in the Git repository.
Argo CD supports defining Kubernetes manifests in a number of ways:
- helm charts
- kustomize
- ksonnet
- jsonnet
- plain directory of yaml/json manifests
- custom plugins
Argo CD compares the actual state of the application in the cluster with the desired state defined in Git and determines if they are out of sync. When it detects the environment is out of sync, Argo CD can be configured to either send out a notification to kick off a separate reconciliation process or Argo CD can automatically synchronize the environments to ensure they match.
Note
Confidential information like passwords and security tokens should not be checked into the Git repository. Managing secrets in Argo CD provides information on how to handle confidential information in the GitOps repo.
Configuring GitOps with Argo CD
Terminology:
Argo CD uses a number of terms to refer to the components
-
Application - A deployable unit
In the context of the environment, an application is one Helm chart that contains one container image that was produced by one CI pipeline. While Helm charts and images could certainly be combined to make more sophisticated applications in more advanced scenarios, we will be using this simple definition here.
-
Project - A collection of applications that make up a solution
Set up the GitOps repo
Argo CD uses a Git repo to express the desired state of the Kubernetes environment. The basic setup uses one repository to represent one project. Within that repository, each application that makes up the project will be described in its own folder. The repository will also contain a branch for each destination (i.e. cluster and namespace) into which we want to deploy the applications.
Note
There is nothing special about a git repository used for git-ops. All that is required at a minimum is a hosted git repository that is accessible from by the Argo CD instance. The Argo CD template used in the following steps is optional and provides some application templates to help simplify some configuration activities.
-
Create a new repo from the Argo CD template.
Click Use this template - If you see a 404 error when you click on the link, you need to sign in to github.
-
Clone the project to your machine
git clone ${GIT_URL_GITOPS} -
navigate into the directory
cd ${GIT_DIRECTORY} -
Create and push test branch
git checkout -b test
git push -u origin test
Hook the CI pipeline to the CD pipeline
The last stage in the CI pipeline updates a GitOps repository with the updated application metadata from the build. In order to do that, the CI pipeline needs to know which repository should be used and needs the credentials to push changes to that repository. As with other configuration within the pipeline, this is handled with config maps and secrets:
- A secret named
git-credentialsholds the credentials the CI pipeline uses to access all the repositories in the Git host (e.g. GitHub, GitLab, BitBucket, etc). If you used the IGC CLI to register the pipeline then this secret has already been created. - A config map named
gitops-repoholds the url and branch for the gitops repository.
Fortunately the IGC CLI provides a gitops command to simplify this step. Information on how to use the command as well as the alternative manual steps can be found in the IGC CLI gitops command section.
-
Make sure to switch context to the project/namespace CI namespace
oc project ${DEV_NAMESPACE} -
Run the
gitopscommand to create the config map and secret in the CI namespaceigc gitops
Note
- For the secret to be available to the CI pipeline, the secret needs to be created in the same namespace where the pipeline is running.
- The value provided for
branchis the one the pipeline will use to when committing changes to trigger the CD pipeline.
As of v2.0.0 of the Tekton tasks and the Jenkins pipelines, the CI pipeline will create a folder and the initial configuration for an application deployment if it doesn't already exist. This means, there is no other manual configuration required to set up the repository.
Now run a new Pipeline and make sure a directory for the application is created on the gitops git repository. This is required before configuring ArgoCD.
Configure Release namespaces
ArgoCD will deploy the application into the "releases" namespace such as ${TEST_NAMESPACE} or ${STAGING_NAMESPACE}
-
Create a release namespace where ArgoCD will deploy the application
oc new-project ${TEST_NAMESPACE}
The release namespaces need pull secrets for the application container images to be pull.
If you are using the OpenShift Image Registry then you need to give permission to the services accounts in the "release" namespaces to be able to pull images from the "development" namespaces.
- Grant access to service accounts in the new
testorstagingnamespace to pull the container image from thedevnamespace
oc policy add-role-to-group system:image-puller system:serviceaccounts:{TEST_NAMESPACE} -n {DEV_NAMESPACE}
If you are using the IBM Container Registry then you need to copy the pull secret all-icr-io from the default namespace and then add this secret to the service account used by your application (ie default service account)
- Use the Toolkit CLI to copy the secret and setup the service account
igc pull-secret ${TEST_NAMESPACE} -t default -z default
If you are using an external image registry from a 3rd party provider like quay.io or dockerhub.io then you need to create the pull secret of type "docker-registry" and add it to the service account. Check the OpenShift Documentation Using pull secrets
Register the GitOps repo in ArgoCD
Now that the repository has been created, we need to tell ArgoCD where it is.
-
Log into ArgoCD
-
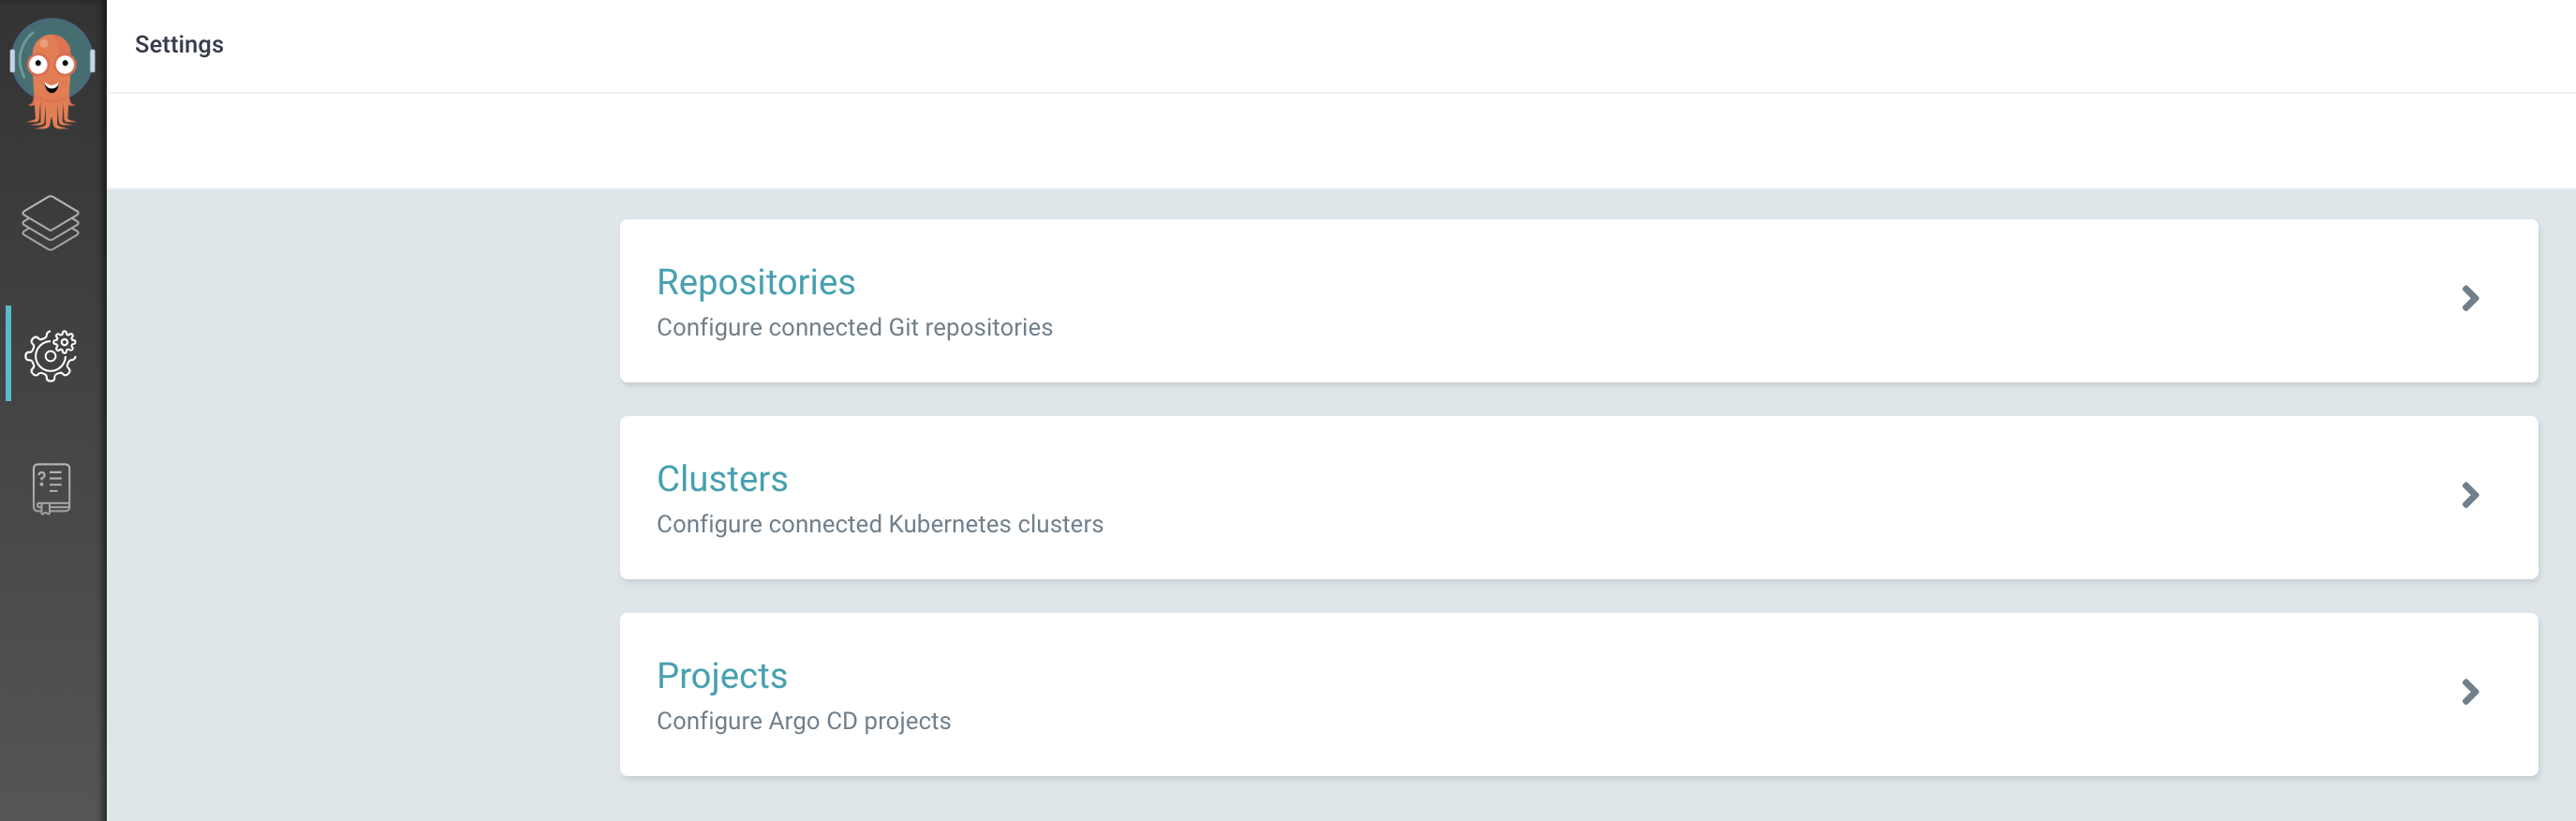
Click on the gear icon on the left menu to access the Settings options
-
Select the
Repositoriesoption -
Click either the
Connect Repo using HTTPSorConnect Repo using SSHbutton at the top and provide the information for the GitOps repo you just created. ForHTTPSyou can use the access token you used when you ranigc gitops
Create a project in Argo CD
In Argo CD terms, each deployable component is an application and applications are grouped into projects. Projects are not required for Argo CD to be able to deploy applications, but it helps to organize applications and provide some restrictions on what can be done for applications that make up a project.
-
Log into the Argo CD user interface
-
Click on the gear icon on the left menu to access the Settings options
-
Select the Projects option
-
Press the New Project button at the top of the page
-
Specify the properties for the new project
- Name - Provide the name for the project
- Description - A brief description of the project
- Source - Press Add source and pick the Git repository from the list that was added previously
- Destinations
- Add
https://kubernetes.default.svcfor the cluster url and${TEST_NAMESPACE}for the namespace - Add
https://kubernetes.default.svcfor the cluster url and${STAGING_NAMESPACE}for the namespace
- Add
- Press Create
Note: Initially, the only cluster that is available is the one in which Argo CD is -
https://kubernetes.default.svc. By adding the two destinations we have allowed the project to be deployed to both the${TEST_NAMESPACE}and${STAGING_NAMESPACE}namespaces within the current cluster.
-
Log in to the Argo CD CLI
argocd login {GRPC_INGRESS_HOST} --grpc-web [--sso]where:
GRPC_INGRESS_HOSTis the host name of the grpc endpoint. On Red Hat OpenShift this is the same as the UI host--ssois an optional flag used when sso authentication is enabled. If not using SSO then you will be prompted for the username and password
The grpc url and credentials can be retrieved from the
igc credentialscommand -
Create the project
argocd proj create {PROJECT} --dest {CLUSTER_HOST},{TEST_NAMESPACE} --src {GIT_REPO}where:
{PROJECT}is the name you want to give to the project.{CLUSTER_HOST}is the url for the cluster server to which the project applications can be deployed. Usehttps://kubernetes.default.svcto reference the same cluster where Argo CD has been deployed.*can also be used to allow deployments to any server.{TEST_NAMESPACE}is the namespace in the cluster where the applications can be deployed.*can be used to indicate any namespace.{GIT_REPO}is the url of the git repository where the gitops config will be located or*if you want to allow any.
Note
The
--destand--srcarguments can be provided multiple times if there are multiple destinations and/or sources that should be configured for the project
- Log in to the cluster from the command line
-
Create a file named
project.yamlwith the following contentsapiVersion: argoproj.io/v1alpha1 kind: AppProject metadata: name: {PROJECT_NAME} spec: sourceRepos: - '*' destinations: - namespace: '*' server: https://kubernetes.default.svc
where:
-
{PROJECT NAME}is the name of the project -
Apply the yaml to the cluster in the namespace where Argo CD has been deployed (e.g.
tools)shell script kubectl apply -f project.yaml -n tools
Add an application in Argo CD for each application component
Warning
Before continuing to setup ArgoCD, please verify that the CI Pipeline run created the directory for the application on the gitops git repository and the directory container the helm related files including requirements.yaml
The last step in the process is to define the application(s) within Argo CD that should be managed. This consists of connecting the config within the Git repo to the cluster and namespace.
==== "Argo CD UI" 1. Log into Argo CD user interface 1. Press New Application and provide the following values: - application name - The name of the application. It is recommend to use the format of {namespace}-{image name} - project - The ArgoCD project with which the application should be included - sync-policy - The manner with which Argo CD will use to manage the deployed artifacts. Automatic is recommended - repository url - The Git url where the configuration is stored (restricted to git urls configured in the Argo Project) - revision - The Git branch where the configuration for this instance is stored - path - The path within the repository where the application config is located (should be the application name) - destination cluster - The cluster url for the deployment - destination namespace - The namespace where the application should be deployed (restricted to namespaces configured in the Argo Project) 1. Repeat that step for each application and each environment
-
Log in to the Argo CD CLI
argocd login {GRPC_INGRESS_HOST} --grpc-web [--sso]where:
GRPC_INGRESS_HOSTis the host name of the grpc endpoint. On Red Hat OpenShift this is the same as the UI host--ssois an optional flag used when sso authentication is enabled. If not using SSO then you will be prompted for the username and password
The grpc url and credentials can be retrieved from the
igc credentialscommand -
Create an application
argocd app create {APP_NAME} \
--project {PROJECT} \
--repo {GIT_REPO} \
--path {APP_FOLDER} \
--dest-namespace {NAMESPACE} \
--dest-server {SERVER_URL}
where:
{APP_NAME}is the name you want to give the application{PROJECT}is the name of the project created above or "default"{GIT_REPO}is the url of the git repository where the gitops config is be located{APP_FOLDER}is the path to the configuration for the application in the gitops repo{DEST_NAMESPACE}is the target namespace in the cluster where the application will be deployed{SERVER_URL}is the url of the cluster where the application will be deployed. Usehttps://kubernetes.default.svcto reference the same cluster where Argo CD has been deployed
- Log in to the cluster from the command line
-
Create a file named
application.yamlwith the following contentsapiVersion: argoproj.io/v1alpha1 kind: Application metadata: name: {APPLICATION NAME} spec: destination: namespace: {TARGET NAMESPACE} server: {TARGET CLUSTER} project: {PROJECT NAME} source: path: {APPLICATION PATH} repoURL: {REPO URL} targetRevision: {REPO BRANCH} helm: valueFiles: - values.yaml syncPolicy: automated: prune: true selfHeal: truewhere:
{APPLICATION NAME}is the name of the application{PROJECT NAME}is the name of the project (the one created in the previous step ordefault){TARGET NAMESPACE}is the namespace where the application should be deployed{TARGET CLUSTER}is the server api url for the cluster where the application should be deployed. Usehttps://kubernetes.default.svcfor the same cluster where Argo CD has been deployed{APPLICATION PATH}is the path to the folder where the secret template was created{REPO URL}is the url to the git repository{REPO BRANCH}is the branch in the git repository that contains the application configuration
-
Apply the yaml to the cluster in the namespace where Argo CD has been deployed (e.g.
tools)kubectl apply -f application.yaml -n tools
Managing secrets in Argo CD
The following provides the steps to handle protected information in a GitOps repository using the Argo CD Key Protect plugin. The plugin takes yaml configuration as input, looks up the credentials in Key Protect, and generates a secret in the cluster from the results.
Note
If Argo CD was installed via the Toolkit then the plugin should already be installed and ready to use. If not, the instructions for installing the plugin can be found in the plugin documentation.
Prepare the Key Protect instance
As the name suggests, the Argo CD Key Protect plugin) leverages the capabilities of the Key Protect service to manage the protected information. The details for setting up and managing the Key Protect instance can be found in Secret management with Key Protect. From those instructions you can find the information required for the subsequent steps.
Create the secret configuration
The input to the plugin is a directory that contains one or more yaml "secret templates". In this case the "secret template" provides the structure of the desired secret with placeholders for the values that will be pulled from the key management system.
-
Create a directory to contain the secret configuration. The Argo CD template repository has a template in
templates/secrets-pluginthat can be copied as a starting point -
Update the values in the yaml file for the secret that will be created
apiVersion: keymanagement.ibm/v1 kind: SecretTemplate metadata: name: mysecret annotations: key-manager: key-protect key-protect/instanceId: instance-id key-protect/region: us-east spec: labels: {} annotations: {} values: - name: url value: https://ibm.com - name: username b64value: dGVhbS1jYXA= - name: password keyId: 36397b07-d98d-4c0b-bd7a-d6c290163684-
The
metadata.annotationsvalue is optional.key-manager- the only value supported currently iskey-protectkey-protect/instanceId- the instance id of the key protect instance. If not provided then theinstance-idvalue from thekey-protect-accesssecret will be used.key-protect/region- the region where the key protect instance has been provisioned. If not provided then theregionvalue from thekey-protect-accesssecret will be used.
-
The
metadata.namevalue given will be used as the name for the Secret that will be generated. - The information in
spec.labelsandspec.annotationswill be copied over as thelabelsandannotationsin the Secret that is generated -
The
spec.valuessection contains the information that should be provided in thedatasection of the generated Secret. There are three possible ways the values can be provided:value- the actual value can be provided directly as clear text. This would be appropriate for information that is not sensitive but is required in the secretb64value- a base64 encoded value can be provided to the secret. This can be used for large values that might present formatting issues or for information that is not sensitive but that might be obfuscated a bit (like a username)keyId- the id (not the name) of the Standard Key that has been stored in Key Protect. The value stored in Key Protect can be anything
-
-
Commit the changes to the GitOps repository
Add the secret application in Argo CD
Once the configuration has been added to the GitOps repository, Argo CD needs to be configured to deploy the secrets.
=== "Argo CD UI 1. Log into Argo CD user interface 1. Press New Application and provide the following values: - application name - The name of the application. It is recommend to use the format of {namespace}-{image name} - project - The project with which the application should be included - sync-policy - The manner with which Argo CD will use to manage the deployed artifacts. Automatic is recommended - repository url - The Git url where the configuration is stored - revision - The branch where the configuration for this instance is stored - path - The path within the repository where the application config is located (should be the application name) - destination cluster - The cluster url for the deployment - destination namespace - The namespace where the application should be deployed - Plugin - In the last section of the UI select Plugin from the dropdown 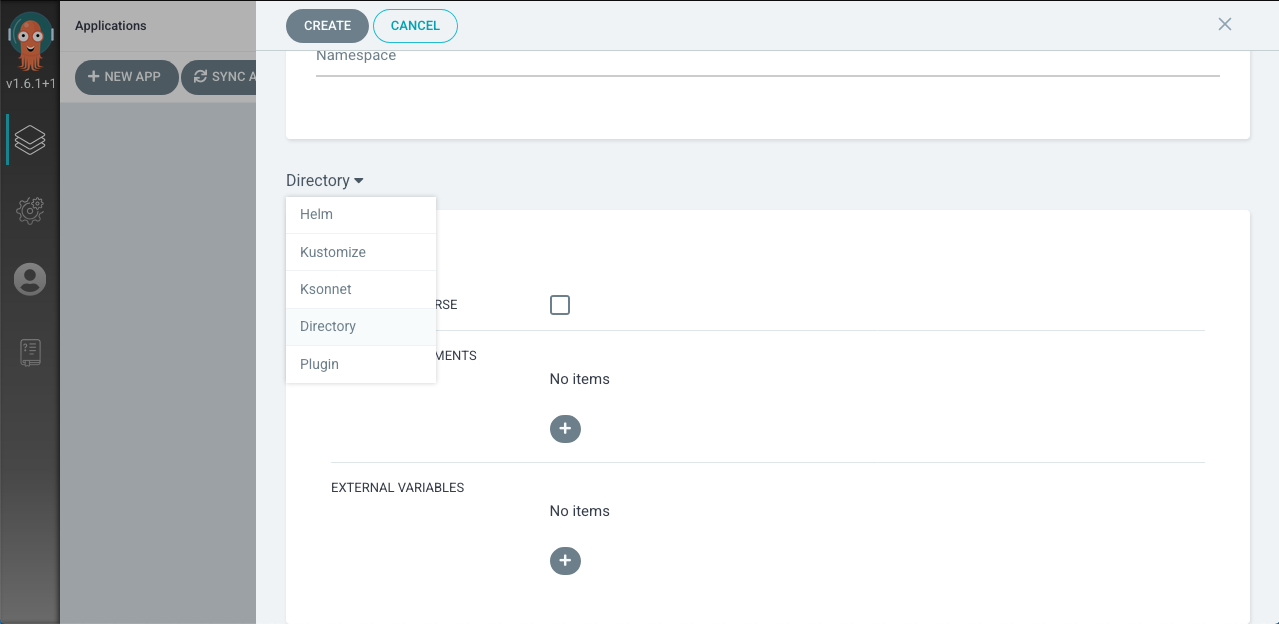 -
- key-protect-secret - Click in the name field and select key-protect-secret from the dropdown 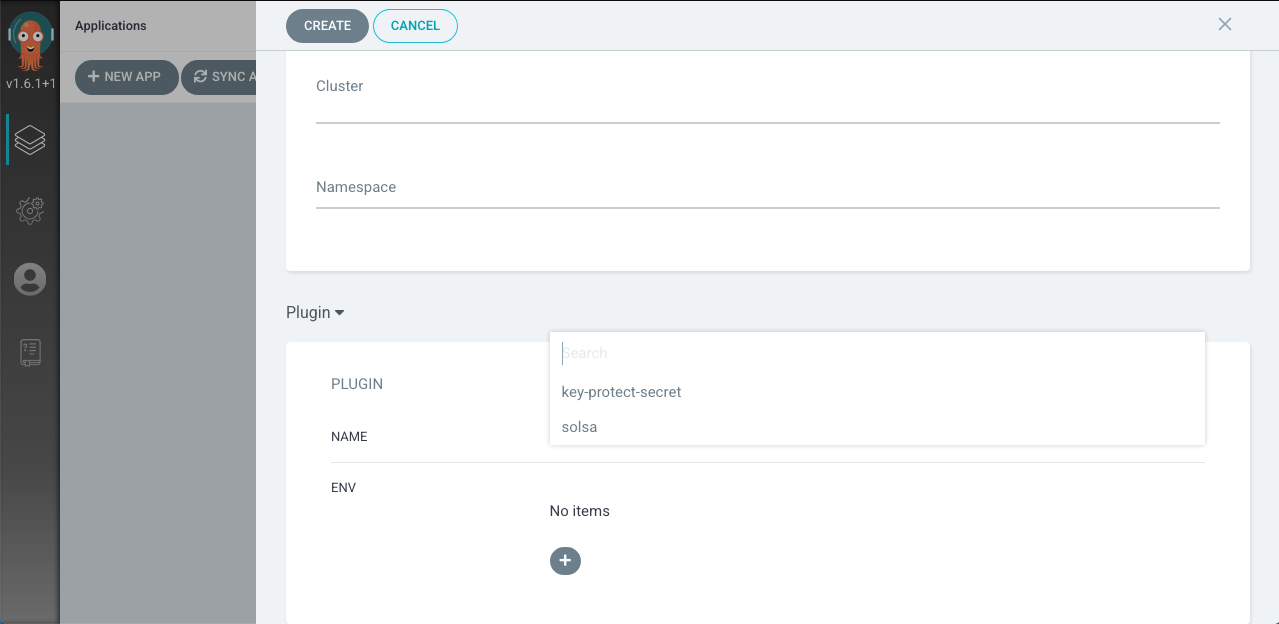 1. Repeat that step for each secret application and environment
-
Log in to the Argo CD CLI
argocd login {GRPC_INGRESS_HOST} --grpc-web [--sso]where:
GRPC_INGRESS_HOSTis the host name of the grpc endpoint. On Red Hat OpenShift this is the same as the UI host--ssois an optional flag used when SSO authentication is enabled. If not using SSO then you will be prompted for the username and password
The grpc url and credentials can be retrieved from the
igc credentialscommand -
Create an application
argocd app create {APP_NAME} \
--project {PROJECT} \
--repo {GIT_REPO} \
--path {APP_FOLDER} \
--dest-namespace {NAMESPACE} \
--dest-server {SERVER_URL} \
--config-management-plugin key-protect-secret
where:
{APP_NAME}is the name you want to give the application{PROJECT}is the name of the project created above or "default"{GIT_REPO}is the url of the git repository where the gitops config is be located{APP_FOLDER}is the path to the configuration for the application in the gitops repo{DEST_NAMESPACE}is the target namespace in the cluster where the application will be deployed{SERVER_URL}is the url of the cluster where the application will be deployed. Usehttps://kubernetes.default.svcto reference the same cluster where Argo CD has been deployed
- Log in to the cluster from the command line
-
Create a file named
secret-application.yamlwith the following contentsapiVersion: argoproj.io/v1alpha1 kind: Application metadata: name: {APPLICATION NAME} spec: destination: namespace: {TARGET NAMESPACE} server: {TARGET CLUSTER} project: {PROJECT NAME} source: path: {APPLICATION PATH} repoURL: {REPO URL} targetRevision: {REPO BRANCH} plugin: name: key-protect-secret syncPolicy: automated: prune: true selfHeal: truewhere:
{APPLICATION NAME}is the name of the application{PROJECT NAME}is the name of the project (the one created in the previous step ordefault){TARGET NAMESPACE}is the namespace where the application should be deployed{TARGET CLUSTER}is the server api url for the cluster where the application should be deployed. Usehttps://kubernetes.default.svcfor the same cluster where Argo CD has been deployed{APPLICATION PATH}is the path to the folder where the secret template was created{REPO URL}is the url to the git repository{REPO BRANCH}is the branch in the git repository that contains the application configuration
-
Apply the yaml to the cluster in the namespace where Argo CD has been deployed (e.g.
tools)kubectl apply -f secret-application.yaml -n tools
Configure another cluster as an Argo CD deployment target
Argo CD supports deploying applications into clusters other than the one into which it has been installed. To do that, the target cluster must first be registered with Argo CD. After that, the deployment target within an application configuration. The following describes the steps required to add another cluster as a deployment target:
-
Log in to the Argo CD CLI
argocd login {GRPC_INGRESS_HOST} --grpc-web [--sso]where:
GRPC_INGRESS_HOSTis the host name of the grpc endpoint. On Red Hat OpenShift this is the same as the UI host--ssois an optional flag used when sso authentication is enabled. If not using SSO then you will be prompted for the username and password
The grpc url and credentials can be retrieved from the
igc credentialscommand -
Log into the target cluster from the command line
-
Run the Argo CD command to list the available clusters
argocd cluster addThe currently selected cluster will be the one with the asterisk next to it. Copy the cluster id from the table
-
Add the cluster to Argo CD
argocd cluster add {CLUSTER ID}where:
{CLUSTER ID}is the id of the target cluster from the previous step
-
Confirm the configuration by listing the known clusters
argocd cluster list